Custom Domain
Read this guide for further information on how to use your own domain with VyHub.
You do not need to use your own domain; we offer you a free vyhub.app or serverstore.io domain (e.g.,
gaming.vyhub.app or your-community.serverstore.io).
A domain name is the name of a website (like vyhub.net or google.com)
We do provide a detailed guide on how to set up your custom domain with Namecheap.
General Steps
- Buy your own domain at a domain name registrar of your choice ( e.g. Namecheap*)
- Set the domains CNAME record to the corresponding VyHub URL
CNAME Value
Usually at registrars, the CNAME record consists of two parts:
- Name/Host: The subdomain or root domain you want to use.
- This value has to match the url you set as frontend url in your VyHub instance.
- For the root domain (e.g., your-community.de), use @ (not supported by every registrar).
- For a subdomain (e.g., shop.your-community.de), use shop.
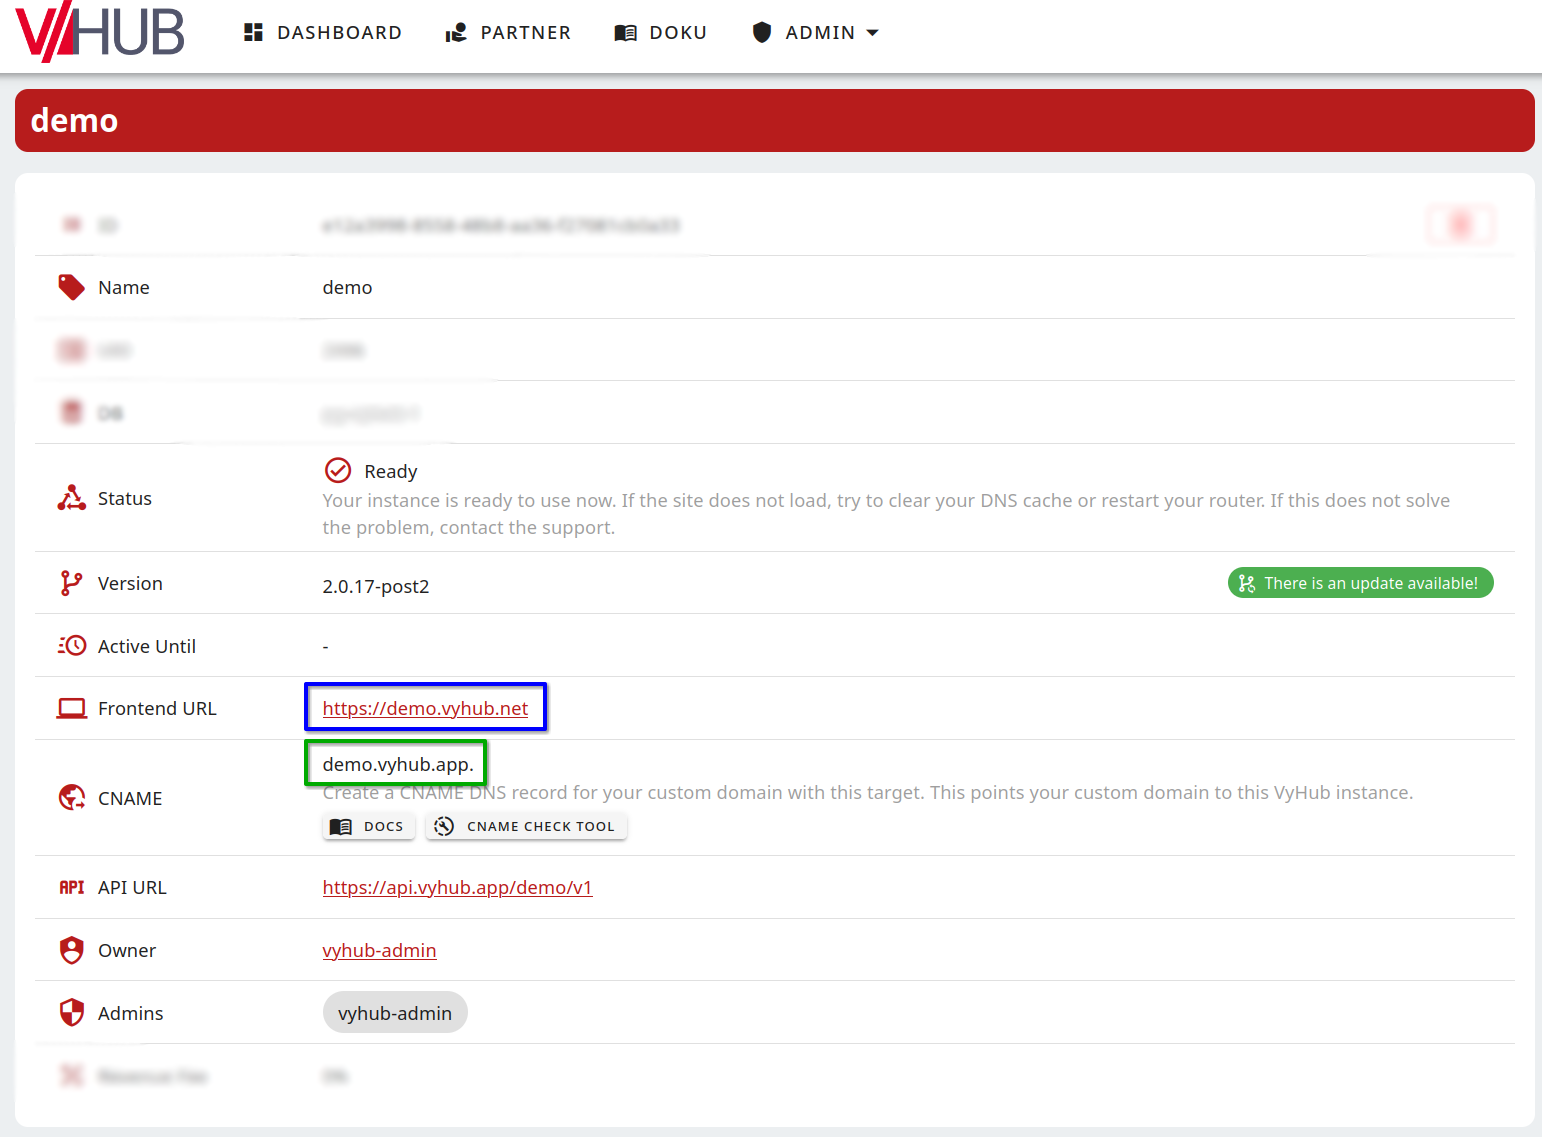
- Value/Points to: The value you need to set, which is provided on the instance details page of your VyHub instance.
- This value has to match the value shown on your instance details page.
- Example: your-community.vyhub.app or your-community.serverstore.io
Set the domains CNAME record
You need to set the CNAME record to our servers, that you can reach VyHub with your domain.
Please search and follow the tutorials on how to set the CNAME record provided by your registrar.
Caution when using Cloudflare: You need to set the proxy status to DNS only. Otherwise, the CNAME will not work.
Some guides are linked below:
My domain registrar does not support CNAME records for the root domain
Many domain registrars do not offer the ability to set a CNAME record for the root domain (e.g., your-community.de).
When your domain registrar does not support CNAME records for the root domain, you can use a subdomain (e.g.
www.your-community.de) and
redirect your root domain to the subdomain.
Redirecting the root domain to the subdomain
Redirect your-community.de to www.your-community.de
Debugging with the CNAME checker
You set your CNAME, but the instance is still not loading? Please check whether the values shown on your instance page match up with the values in the CNAME-checker
- Use the CNAME checker linked in the instance details of your VyHub instance
- Check whether the values match up (next two screenshots)

The values match and it is still not loading? Contact us!
Further help?
Watch our YouTube video or contact us.
Buy your own domain using Namecheap
In this guide, we will use Namecheap, which offers good prices and is one of the biggest registrars in the world.
We also offer a video guide on how to buy a domain with Namecheap here.
Choose your desired domain name, add to cart and checkout
 Enter a domain name and check for its availability
 Add to cart and follow the checkout process
You do not need to add any of the "recommended packages" namecheap offers.
CNAME Value
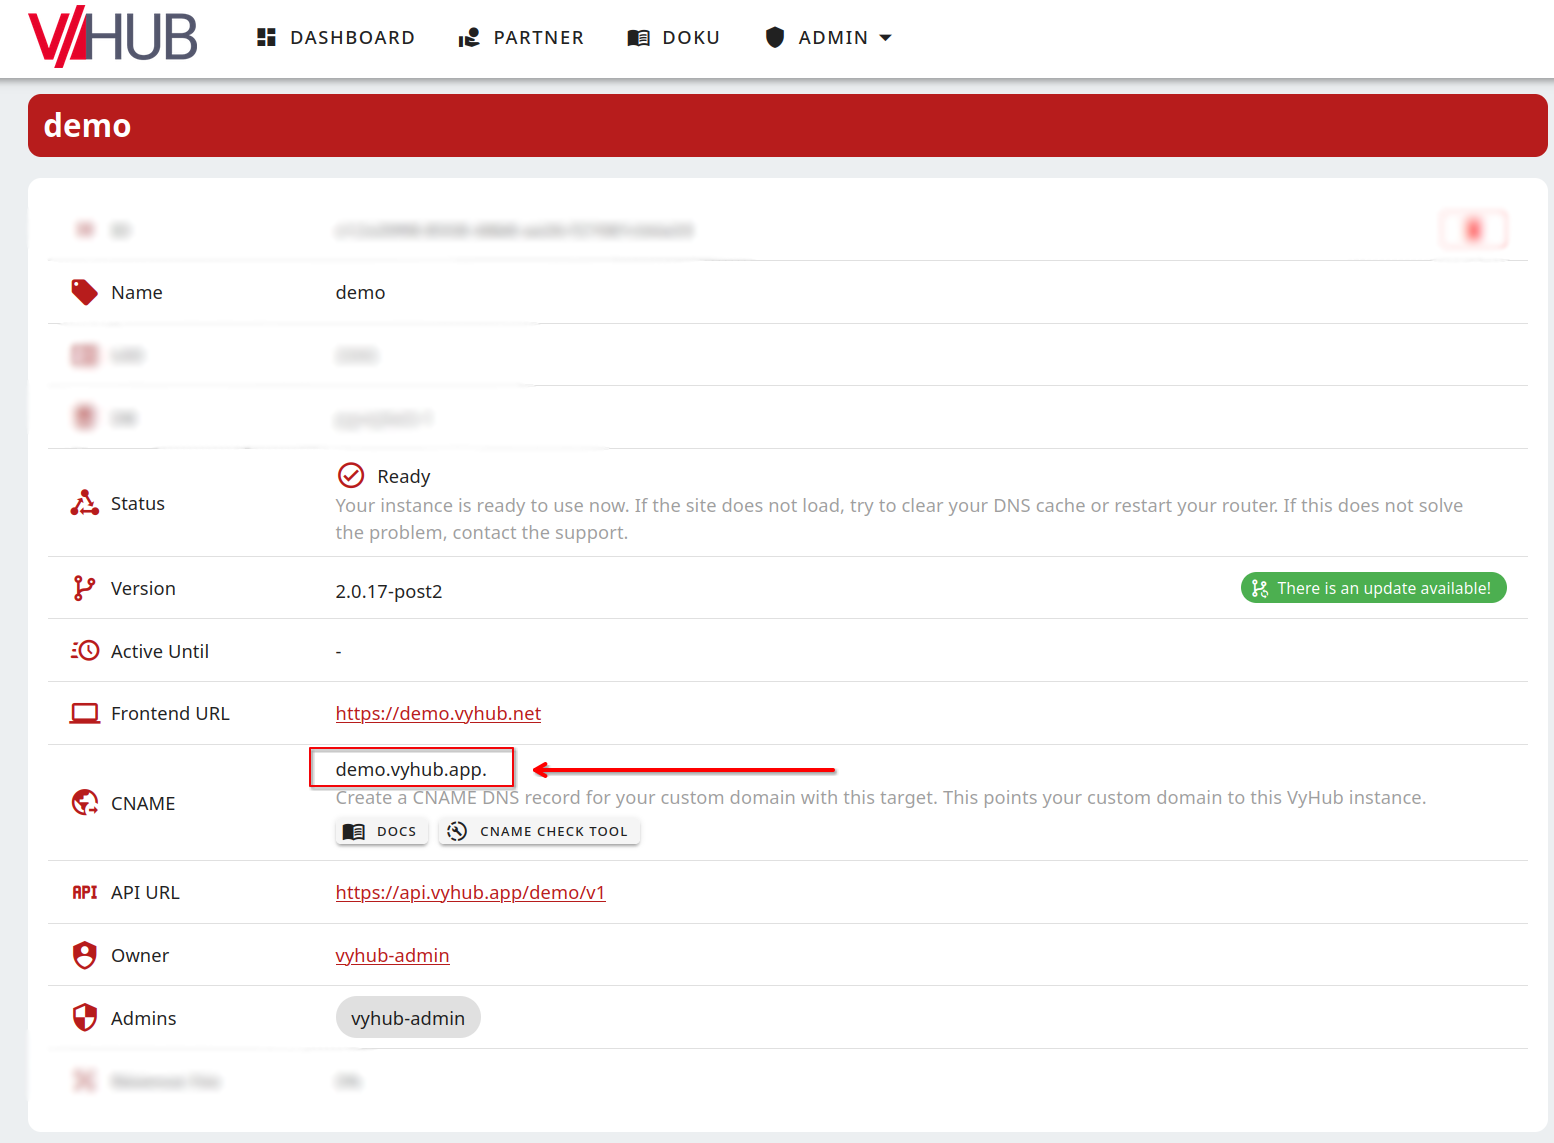 Find the value on the instance details page
Setting the CNAME with a Namecheap.com domain
Follow this guide provided by namecheap.
- Sign in to your Namecheap account
- Select
Domain liston the left - Click the
Managebutton next to your domain - Navigate to the
Advanced DNStab - Click
Add New Recordin theHost Recordssection - Select
CNAME Record - Enter the CNAME value from your instance in the
Valuecolumn - Enter Host value
- Root Domain (e.g. your-community.de) | Value:
@ - Subdomain (e.g. shop.your-community.de) | Value:
shop
- Root Domain (e.g. your-community.de) | Value:
- Click the
Save All Changesbutton
Disclaimer: This post contains affiliate links, and we may earn a small commission when you click on the links at no additional cost to you.